
By Keith Brainard from Brainard Brewing
Editor’s Note: This guest post came about from discussion of the article Life Is Far Too Short To Drink Cheap Beer – 10 Ways To Maximize Your Beer Value where several readers commented that brewing your own beer gives the best value for your money
I have to admit, I have a problem. Whenever I go to the liquor store, I just can’t resist the most expensive beers in the case. In fact, if a place doesn’t have beers with corks or beers with vintages, I won’t really go there. I find myself walking out of a good beer store with an armful of beers and down a hundred bucks.
Fortunately, I have a solution to my problem. I am versed in the science and the art of brewing beer at home. In fact, I’ve made dozens of batches of beer. I’ve become pretty good at making beer, and it turns out you can make any beer for less than a buck a bottle, two cases at a time. If you really try, you can get it down cheaper than that. I’m going to let you all into the secret of how anyone can make beer that’s as good as or better than anything that you can buy at retail.
Making beer is easy. The best way to get started is using malt extract. With extract brewing, you take a few cans of malted barley syrup, dilute it to a few gallons, boil it for a while, top off up to five gallons, add yeast and ferment. A few weeks later, after fermentation is done, you bottle it, and then you drink it a few weeks after that. Here are ten easy steps to make your own beer at home:
1. Buy the start-up equipment
Like anything these days, there are two kinds of homebrew supply stores. Some are brick-and-mortar and may be just around the corner. Others exist in the ether of the Internet. Check your phone book for your local home brew shop (LHBS), or do a Google search on “homebrew supply.” There are many out there, but I happen to like Northern Brewer.
Basic Equipment: You can get a basic start-up equipment kit from Northern Brewer for $67.99 plus shipping. This includes almost all the reusable items you’ll need. Reusable items not included are empty beer bottles and a brew kettle. You will also need cleaner/sanitizer and bottle caps after you use up what comes with the kit.
Brew Kettle: This is basically a big stockpot. I recommend a 30-quart turkey fryer heated by a propane burner. You’ll have to use it outside (propane has harmful fumes), but it will serve you very well in brewing extract beers, and even beyond that if you want to take your hobby to the next level. You can get a powerful turkey fryer and burner for about $60 at Amazon.com. Shop around at stores like Home Depot – you can probably get it cheaper. A bonus with this is that you can fry a turkey if you’re so inclined. If you need to brew indoors, you could get a smaller 20-quart stock pot and cook on your stove-top.
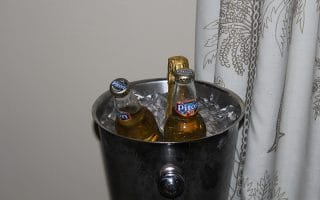
Empty Bottles: You’ll need two cases of bottles for each batch of beer you make. You can do this one of two ways. First is the boring way, where you buy a bunch of clean empty bottles for about $13 a case. Second is the fun way, where you buy bottles full of beer for about $20-$30 a case, then drink the beer and clean the bottles yourself. You could even go to parties and take home all the empty bottles. The party host will thank you because they won’t have to clean up the bottles themselves, and you will thank the host for the free glass. It’s a win-win! Just make sure the bottles are brown and don’t use twist-off caps. Also, make sure you clean them right away – you don’t want mold in the bottom of your bottles.
2. Buy ingredients
Just like the initial equipment, there are lots of local shops and online storefronts where you can get your ingredients. Typical ingredients are malt extract, hops, and yeast. Get an ale kit, so you can ferment at room temperature. A preconfigured beer kit for just about any common style will cost you less than $30.
A basic recipe might be 6.6 lbs. Pale Liquid Malt Extract, 1 lb. Light Dried Malt Extract, 1 oz. Centennial hop pellets (boil for 60 minutes), 1 oz. Cascade hop pellets (boil for 5 minutes), Wyeast 1056 American Ale Yeast.
This kit will make 5 gallons of beer, sufficient for about two cases bottled. I can’t buy a case of good beer for less than $20, so this represents at least a $10 per batch savings. As I mentioned in the intro, most beer I buy any more costs more like $10 per four-pack, or $60 per case. It might cost me $50 to make a beer like that, but I would still save $70 per batch.
3. Clean and sanitize everything
Now we get into the brewing process. The first thing you’ve got to do is clean and sanitize everything. Sanitation is perhaps the single most important step to the brewing process. Your start-up kit will probably come with one-step no-rinse sanitizer. This will last you a short time, but soon you’ll need to buy your own cleaner/sanitizer. Different brewers prefer different cleaners and sanitizers. I like Easy Clean and StarSan. I get a pound of Easy Clean for $15, and a half pint of StarSan for $12. That lasts a while.
4. Steep grains
Your kit probably came with specialty grains. These need to be steeped in hot water, much like tea, to extract specialty flavors. This provides complexity not found in simple malt extract. Your kit will have exact directions, but normally you steep the grains at around 150 degrees F for 30 minutes in 1.25 quarts of water per pound of grains. Then remove the grains and turn the heat back on to begin to boil the grain tea you just made.
5. Boil extract and hops
Once your water is boiling, it is time to add your malt extract. This is the stuff that will provide the sugars for your yeast to eat to make alcohol. Remove the kettle from heat, thoroughly stir in all the extract, and return the kettle to your cooking surface. Your kit will also have a few hop additions to be added at different times in the boil. Hops added early in the boil add bitterness. Hops added later in the boil add flavor and aroma. Your kit will tell you when to add which hops. Normally you have a dose of hops to be added with 60 minutes left in the boil, and then a dose to be added near the end of the boil. When you add hops, you add them and just leave them in there until after you are done boiling.
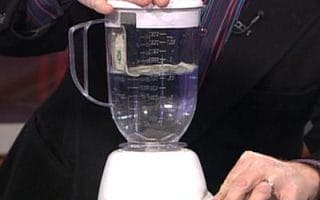
6. Cool wort and aerate
After boiling the wort, you need to cool it down to about room temperature before you can add yeast to it. You can cool the wort just by putting your kettle into an ice water bath in your kitchen sink or bathtub and stirring it for a while. Once your newly cooked beer is down to room temperature, you strain it to get out the solids that are a byproduct of the brewing process, such as hop pieces. Put your strainer over the fermenter bucket, and pour from the kettle to the fermenter, taking care to strain out as much as possible. Add water to the fermenter sufficient to yield five gallons of beer – there will be lines on the side of your fermenter to help you know where five gallons is. Then pour the wort back and forth between the kettle and fermenter several times. This will make it very foamy, which is good. That foam contains oxygen, which your yeast will appreciate. Now is also the time to take a sample that you can use to measure your starting gravity. This will be used in conjunction with your finishing gravity to tell you how much alcohol is in your beer when it’s done.
7. Pitch yeast
Before your sweet wort can become beer, you need to add yeast which will eat the sugars and make alcohol.
If you have a Wyeast smack pack of yeast, you should have activated it about 12 hours or more before brewing. It should be nice and puffed up hard. Sanitize the yeast pack, and scissors then cut open the bag, and pour it into the fermenter.
If you have a White Labs vial, you should have taken it out of the fridge when you started brewing, and it should be room temperature. Sanitize the vial, twist off the cap, and pour in the yeast solution.
If your kit came with dry yeast, rehydrate the yeast as instructed on the packet, taking care to maintain sanitary conditions, and then add the rehydrated yeast to the future beer.
Shake around the fermenter full of beer and yeast to mix it up nicely, press the lid onto the bucket, fill the airlock with sanitizer, and put it into the grommeted hole on the lid. Put the fermenter in an environment with a fairly stable temperature around room-temperature and out of direct light. A closet on the ground floor with some space available on the floor usually works pretty well. Depending on the season, a basement might be preferred.
8. Ferment
Now you just have to wait. And wait. In a day or two, your airlock will start to bubble. This is perhaps my favorite part of brewing. It is so fulfilling to go check on the beer and see those bubbles coming out. They smell kind of funny since the CO2 that’s coming out is some byproduct of yeast, but that’s normal. In a week or so, the bubbling will slow down. After about two weeks it is probably done. Measure the gravity two or three days in a row, and if it hasn’t changed then you’re done. If you don’t want to measure your gravity, just wait for a week or two after all airlock bubbling is done, and you’ll be fine.
9. Bottle
Finally, it is bottling time. You need to prime the beer with a bit more sugar to give the yeast that still resides in your beer something to feed on while they’re in the bottles. The yeast will eat the sugar, and create carbon dioxide, which will be trapped in the bottle, and eventually equilibrate and cause the beer itself to become carbonated. This is generally four or five ounces of sugar for five gallons of beer. Your kit will come with a little packet of sugar to use. This step takes two or three weeks. I like to use a plastic bottle (yes you do have to buy these online or at the LHBS) so I can squeeze it to easily determine the level of carbonation in the beer. Soft=flat, hard=fizzy. If you don’t have a plastic bottle, you can test bottles one at a time after about two weeks.
10. Drink up!
At last, all your fun work and hard waiting have paid off. You made beer for less than you could buy it for, and it probably tastes better. Congratulations!
This really is just the most basic introduction to the joys of brewing. There are so many refinements to the brewing process which are way beyond the scope of this article. For more information, see:
- How to Brew by John Palmer
- The Complete Joy of Homebrewing by Charlie Papazian
- Many online homebrewer forums, such as the one at Northern Brewer
Keith Brainard is an avid homebrewer and a beer entrepreneur dedicated to spreading the love of beer to all who will listen, and even to those who are not so sure about it. As a beer consultant, he provides beer marketing services and training to beer retailers and beer training and advice to regular people. He also blogs about beer.
Glossary
Ale: a Broad class of beer characterized by top-fermenting yeast. Most microbrewed beers are ales, and generally, ales tend to be more robust and carry fruity notes in the taste and aroma.
All-Grain: A method of brewing involving mashing grains to extract fermentable sugar. All-grain is more cost-effective than extract brewing, but it also requires more equipment and skills.
Brew Kettle: A big cooking pot, normally stainless steel or aluminum, used to boil the wort while adding hops.
Extract: Concentrated wort. This can be either “liquid malt extract” (which is more like syrup) or “dried malt extract” (which is more like non-dairy creamer). Both are basically the same, as they allow you to skip time and equipment intensive mashing procedures in favor of jumping right to the boil.
Hops: Flowers that grow on vines which impart bitterness on beer when boiled for prolonged durations. There are many varieties of hops, each of which has their own bittering, aromatic, and flavor characteristics.
Lager: a Broad class of beer characterized by bottom fermenting yeast. Most macro-brewed beers are lagers, and generally, lagers are clean, crisp, and dry due to extended cold temperature aging.
LHBS: Local Homebrew Shop
Malt: Shorthand for “malted barley, or “malted grain, this is grain that has been allowed to begin germination and then suddenly dried. This converts starches in the grains to sugars which can be extracted by mashing.
Mash: Soaking malted barley and other brewing grains in hot water, around 152 degrees F, for a long time, around an hour, in order to extract fermentable sugars from the grains.
Trub: Junk left at the bottom of the brew kettle after boiling wort. It includes hops and coagulated proteins and things.
Wort: Sweet liquid consisting of extracted fermentable sugars and boiled hops. This is “pre-beer” – it contains all the fuel needed for yeast to make it from a sweet grain tea into foamy alcohol-laden beer
Yeast: a Single-celled organism that converts sugars into alcohol and carbon dioxide. Without yeast, there would be no beer. Bread yeast isn’t for making beer (although it can be done) and the yeast must be active, so the stuff from the health store is out, too.

Alexa Mason is a freelance writer and internet entrepreneur. She is also a parent to two beautiful little girls. She chronicles her journey as a single mom working on building financial security.
Read More


Dollar stores have become quite popular and there are definitely tons of deals. While you…

Navigating the realm of wealth and fame isn't always a glamorous journey for celebrities. The…
"What can I do with a dollar?" Many people don't think a dollar is worth…

Eating out doesn't have to break the bank. Contrary to the notion that dining at…
Beer guys shouldn't date girls. The party was out of my league. For the champagne…

The best dollar store finds are out there. You just have to know what makes…
Comments